Polymarket is a prediction market where you buy and sell binary “yes/no” shares on real-world events — elections, sports, crypto prices, economic data. You trade against other users on an order book, not against a bookmaker, and prices between $0.00 and $1.00 read as the market’s implied probability of the event happening.
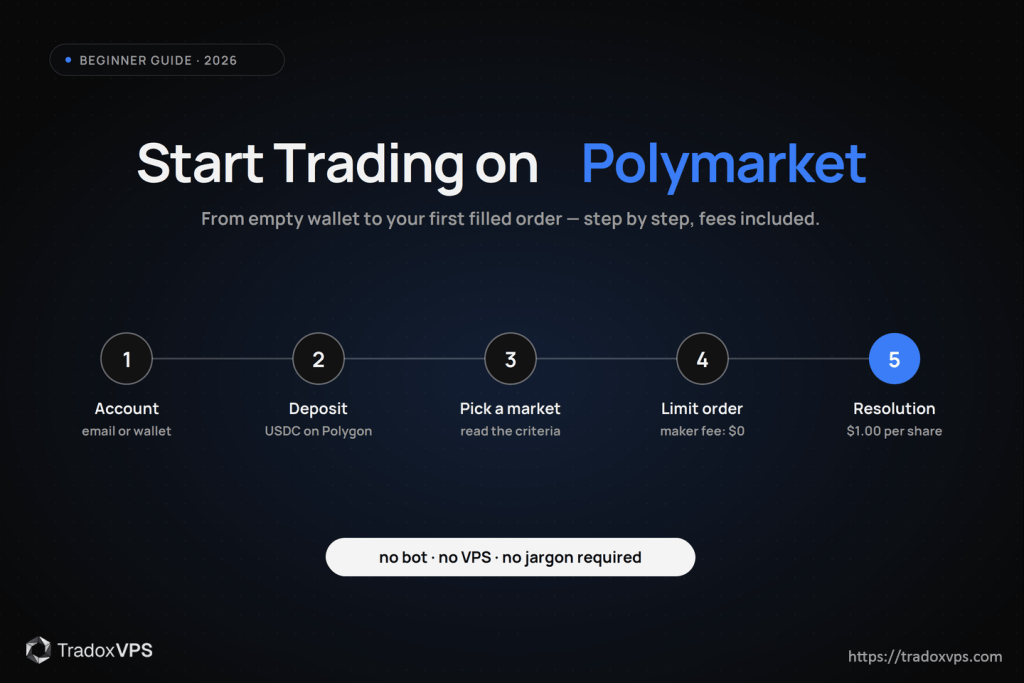
For beginners it can look intimidating: order books, wallets, USDC, and talk of trading bots all sit close together. So let’s say the most important thing first: you do not need a VPS, a bot, or any special infrastructure to start. Those are optimization tools for a later stage this guide describes honestly at the end. What you need today is an account, a few dollars of USDC, one carefully chosen market, and a limit order.
By the end you’ll know how Polymarket works mechanically, how to set up an account two different ways, how to deposit, how to place and manage your first order — including what it costs under the 2026 fee structure most older guides don’t mention — and how to size positions so one wrong call never matters much.
How Polymarket works: the two-minute version
Every market is a binary question — “Will Bitcoin be above $100,000 by December 31, 2026?” Each outcome is a token: YES shares pay $1.00 if the event happens and become worthless if it doesn’t; NO shares do the reverse. A YES price of 62¢ means the market collectively prices a ~62% probability. If you think the real probability is higher, you buy YES; if lower, you buy NO — buying NO is the bet against, no separate “shorting” required to get started.
Under the hood, Polymarket matches orders on a central limit order book and settles them on the Polygon blockchain in USDC, with outcomes resolved through the UMA optimistic oracle. Two practical consequences for you: your funds sit in a wallet you control rather than an exchange account, and trades themselves are gasless — you’ll sign orders for free, and only deposits/withdrawals touch network costs.
One routing note before you create anything: there are effectively two Polymarkets in 2026. The global platform (this guide’s main path) is geoblocked for US users. The Polymarket US exchange — CFTC-licensed, with identity verification and fiat funding — is the route if you’re in the United States; its onboarding is more like a brokerage and its fee schedule is published separately. The mechanics of markets, prices, and orders below apply to both.
Step 1: Create your account (two paths)
Path A — email sign-up (easiest). Polymarket supports signing up with an email or social login, which creates an embedded wallet for you behind the scenes. No browser extension, no seed phrase on day one, and you can export to self-custody later. If the crypto plumbing is what’s been stopping you, start here.
Path B — your own Web3 wallet (most control). Install MetaMask, create a wallet, set a strong password, and write the 12-word recovery phrase somewhere offline — never in a cloud note, email, or chat. That phrase is the money: anyone who has it has your funds, and if you lose it, no support desk can help. This path keeps custody fully in your hands and is the one you’ll want eventually if you automate.
Either way, you’ll land on the same markets with the same prices.
Step 2: Connect and get on the right network
On Polymarket, click Connect Wallet (Path B) or just log in (Path A). MetaMask users will be prompted to add or switch to the Polygon network — that’s a single approval and entirely normal; it points your wallet at Polygon instead of Ethereum mainnet. Polymarket sees your public address and balances; it never holds your private keys.
Step 3: Deposit USDC
The global platform trades in USDC on Polygon, and the deposit flow offers several routes — exchange transfer, card on-ramps, and bridges. The classic path:
- On an exchange (Coinbase, Binance, Kraken), withdraw USDC.
- Paste your wallet address, and — the step that matters — select the Polygon network for the withdrawal.
- Funds typically arrive within minutes.
If you pick the wrong network, your USDC isn’t destroyed — it lands on the chain you selected instead of Polygon — but recovering it ranges from annoying to genuinely difficult depending on the wallet. Double-check the network line every time; it’s the one habit that prevents the classic beginner support ticket. (Polymarket’s help center walks through every current deposit option if yours looks different.)
Start small. Your first deposit is tuition, not capital — $20–50 is plenty to learn every mechanic in this guide.
Step 4: Read a market before you trade it
Open any market and you’ll see the question, the YES/NO prices, a price chart, and the order book — bids (buyers) stacked on one side, asks (sellers) on the other. Two order types matter:
- A market order fills immediately at the best available price — fast, but you pay the spread, you’ll take whatever slippage thin books offer, and (since 2026) you’ll pay taker fees in most categories.
- A limit order names your price and waits in the book until someone trades into it.
For beginners, limit orders aren’t just safer — under the current fee structure they’re often free. Which brings us to the thing most older guides skip entirely.
Step 5: Your first order — with the real 2026 cost math
Polymarket’s zero-fee era ended on March 30, 2026. The global platform now charges takers (orders that execute immediately against the book) a formula-based fee — rate × price × (1 − price) per share — that varies by category, peaking at mid prices: roughly $0.75 per 100 shares on sports up to $1.80 on crypto, with geopolitics markets fee-free and, crucially, makers paying nothing. Resting limit orders that get filled are maker orders. Full current numbers: Polymarket’s fee article, and the deeper math (why fees peak at 50¢ and vanish near the extremes) in our fee-curve breakdown.
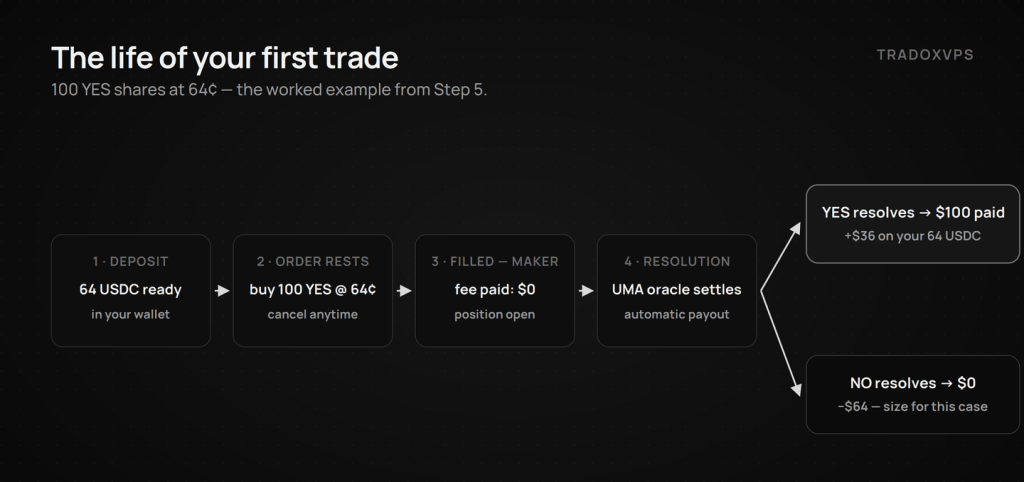
Worked example. You believe Bitcoin clears $100k by year-end; YES trades at 62¢ and you think that’s low. You place a limit buy: 100 YES at 64¢.
- Cost if filled: 0.64 × 100 = 64 USDC — and if your order rested in the book and was filled by someone else, you paid zero fee as the maker.
- If instead you’d swept the book with a market order in, say, a crypto-category market near mid prices, expect up to ~$1.80 per 100 shares in taker fees on top — small per trade, decisive across hundreds of trades.
- Payout if YES resolves: 100 shares × $1.00 = $100. If NO resolves: $0. You can also sell anytime before resolution at the market’s current price.
Place the order, confirm the signature (free), and it sits in the book at 64¢ — fills if the market trades there, cancellable anytime before it does. Your position then appears under My Positions with live unrealized P&L: (current price − entry) × quantity.
Step 6: Position sizing — the part that decides whether you last
Every Polymarket position is binary: at resolution it’s worth $1 or $0 per share. The standard risk-management heuristics exist for exactly this payoff shape:
- 1–2% of your trading capital per market while learning; never more than 5–10% on any single event, however “obvious.”
- With $1,000 of capital, that’s $10–20 per position to start — at 60¢, roughly 17–33 shares, not a thousand.

This feels uselessly small until the first time an “obvious” market resolves against you on a criteria technicality, and it costs you a coffee instead of a month. The on-chain data is unambiguous about who survives: 84% of wallets lose money, and oversized positions on late entries are the signature loss pattern.
Step 7: Tracking, resolution, and getting paid
Your positions page shows open positions, closed trades, and unrealized P&L. When a market resolves — via the UMA oracle on the global platform — settlement is automatic: $1.00 per winning share, $0 per losing share, paid in USDC to your wallet. From there you can trade on, or withdraw (back to an exchange and out to fiat, or wherever you keep stablecoins). One habit worth building immediately: read the resolution criteria before you buy, not after. Most beginner “the market robbed me” stories are criteria stories.
Step 8: Practice properly (there is no demo mode)
Polymarket has no testnet or paper-trading mode, so practice the way professionals do it: journal trades before you fund them. For two weeks, write down markets you would trade — your probability estimate (written before looking hard at the price), the price, your intended size — and track how those hypothetical positions resolve. Then fund the account and keep the exact same journal with real money and tiny size: date, market, side, your pre-price probability, entry, exit, result, one sentence on what you got right or wrong. After 25–50 entries you’ll know something most traders never learn about themselves: whether your 70% calls actually happen 70% of the time. That calibration — not a hot streak — is the green light to size up, and it’s the foundation of every approach in our beginner strategies guide.
Two more habits that compound: never chase a loss with a bigger position, and take a break after any outsized win or loss — the next trade placed on emotion is statistically your worst.
Step 9: When infrastructure starts to matter (honestly)
Everything above runs from a browser on your laptop, and for manual trading that’s the right tool — a home PC’s real weaknesses (sleep, updates, dropped Wi-Fi) only matter once software is trading for you. Infrastructure enters when your strategy becomes one of these:
- 24/7 automation — a bot market-making for liquidity rewards or managing positions while you sleep needs a machine that never does.
- Time-competitive strategies — cross-platform arbitrage and news-reaction trading are races measured in tens of milliseconds, where the contest is decided in latency tails.
On speed, we’ll quote only what we’ve measured: in our public four-provider benchmark, our Dublin boxes saw Polymarket’s live feed at ~13–15 ms median and round-tripped the order book at ~21–23 ms warm — nobody measured single-digit milliseconds, us included, and a US home connection adds the Atlantic crossing plus consumer routing on top. When you reach that stage, the bot setup guide and sizing guide cover the build, and the same benchmark script runs free on any box — including a 3-day demo of ours — so you can verify before you pay anyone.
But to say it one final time: none of this is a prerequisite. Wallet, small deposit, limit order, journal. That’s the whole starter kit.
Quick recap
- Pick your path: email sign-up (easiest) or your own wallet (most control) — US readers route to Polymarket US.
- Connect, switch to Polygon if prompted.
- Deposit a small amount of USDC — and check the network line twice.
- Choose one market; read the resolution criteria in full.
- Place a limit order — makers pay no fees under the 2026 structure.
- Size at 1–2% of capital; journal every trade.
- Let resolution pay you in USDC; withdraw or compound.
- Only consider bots and a VPS when your strategy is automated or time-competitive — and verify any provider’s latency claims with measurements, ours included.
Frequently Asked Questions
A prediction market where binary YES/NO shares on real-world events trade between $0.00 and $1.00, with prices reflecting implied probability. Orders match on a central limit order book; positions settle in USDC, with winning shares paying $1.00 at resolution.
On the global platform, yes — you connect a wallet or email login without identity verification, but it’s geoblocked for US users. In the United States, the route is Polymarket US, a CFTC-licensed exchange with standard identity verification and fiat funding. Check your jurisdiction’s current rules either way.
Maker orders (resting limit orders) are free on the global platform. Taker orders pay a category-based formula fee peaking at mid prices — roughly $0.75–$1.80 per 100 shares at 50¢ depending on category, with geopolitics markets fee-free. Polymarket US publishes its own schedule. Always check the official fee pages; they’ve changed more than once.
The built-in email sign-up (embedded wallet) is the easiest start. For self-custody, MetaMask is the standard browser choice — guard the recovery phrase offline; it’s the actual key to your funds.
USDC on the Polygon network for the global platform. Deposit from an exchange (select Polygon as the withdrawal network) or use the card/on-ramp options in the deposit flow. Trades themselves are gasless.
Less than you think: $20–50 covers the entire learning phase. Size positions at 1–2% of trading capital, cap any single event at 5–10%, and treat the first deposit as tuition.
No. Manual trading from a browser is the right starting point, and three of the five viable beginner strategies never need more. A VPS matters only for automated, 24/7, or time-competitive strategies — and at that stage, judge providers on published measurements, not advertised milliseconds.
Resolved winnings arrive as USDC in your wallet automatically. Send to an exchange to convert to fiat, or keep it on Polygon for the next market.
Fee figures reference Polymarket’s published schedules as of June 2026 and change — verify before trading. Latency figures are from our published Dublin benchmark. We operate TradoxVPS and provide infrastructure, not financial advice; prediction market trading involves substantial risk, including total loss of capital.